
Playing with the Gameplay Camera | UE5.5
The documentation for UE5.5 Gameplay Camera is atrocious… So here’s what I’ve found so far in my testing:
It seems to have been newly introduced in 5.5, the Gameplay Camera is available in the Plugin Menu (edit menu>plugins and under “cameras”). It says it’s “a modular and data-driven camera system for Unreal.” Which is cool and all, but how does it work?
Well the documentation is here with two pages: The overview, and the quick start. All videos I’ve found so far (as of June 2025) only really go over the Quick Start documentation - understandably.
Why choose this over the other options?
There were 2 main reasons: The Occlusion Material Node and the Modular Multi-Camera Rigs.
1) The Occlusion Material node
An Occlusion Material (not ambient occlusion) makes a mesh see though - very handy if you can’t move your camera.
Found in the gameplay Camera Asset (under rigs and node hierarchy), the occlusion material was the reason I was so intrigued. Initially, super simple to set up, make an Occlusion Material Master for and apply.

Things I noticed:
It only occludes 1 Static Mesh at a time.
Not a skeletal mesh ❌
Not geometry ❌
Not a collection of static meshes turned into Blueprint Class ❌
Not a Level Sequence or similar consisting of multiple static meshes ❌
The static mesh requires collision placed on it

If a static mesh is placed directly in front of another, it will choose to occlude the mesh that is closest to the camera and pixel perfect.

a static mesh absolutely requires collision on the items to make it occlude

If a static mesh’s collision cage is changed, it will affect the occlusion. For example in this blueprint of a whirlybird (below), the 2 static meshes have been placed in a single blueprint. The collision capsule of the base only activates the occlusion material once the capsule is larger than the collision on the fins.
2) Multi-camera rigs
The second reason was: being able to switch between multiple camera rigs, simply. In the game there will be rivers, and impassible spaces that I want to hook the camera to. I thought a good way to get this to happen would be to transition to a specific camera with different settings on it instead of apply multiple “if this, then that” settings on a single camera.
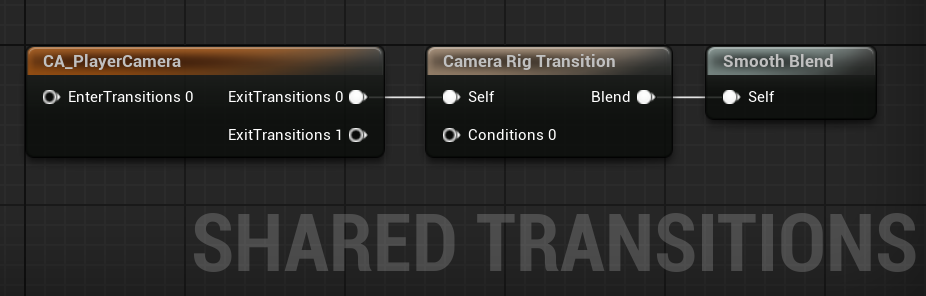
It works well enough.
So far, I have it set up so that if the inputs for zoom in are activated, then the float is set to +1 (clamped to a max of 1), this will make the camera move to rig 0 or 1; and if the inputs for zoom out are pressed, then the float is set to -1 (clamped to a min of -1). This will then set which of the 3 levels of zoom are to be active.
I need to figure out how to get the current screen width, and make the camera default to the middle position perhaps with a slight offset, but for now what I have works.
Important to note:
I came across a very strange bug where when in the Event Graph of the player character’s blueprint if I delete the Set Camera Rig Parameters node, it crashes UE. I will have to see if a reset fixes it. But right now, it seems like it’ll be a permanent piece of my blueprints.
Here’s a dump of Blueprints for the camera rigs for future references
Attached to CDE_PlayerCamera (Camera Director Evaluator)
Showing the FOV settings for Zoom_Step_-1 (the zoomed in rig) Boom Offset and TransformOffset are currently variables - and can be edited using the Set Camera Rig Parameters node in the Character Blueprint.
Sooo, will I stick to this gameplay camera setup?
Yeah probably, at least for now. The modular setup is very nice and unless making a custom occlusion can’t be created, I like the simplicity of being able to add different rigs within the same camera node.
So I’ll be looking for solutions with the occlusion options, and hopefully it all turns out!